Showing posts with label coloring. Show all posts

Feb 21, 2008

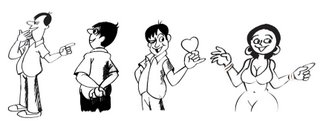
Pencil Sketches and Final Color Composition


The above pencil sketches are created for my blog Santa Cartoons. I am not posting here the final composition of colored cartoon (for the shake of avoiding repetition.). After going through the following description you can View Here the completed colored Cartoon.

Every artist has his own way of creating colored/black and white graphics/cartoons in their favorite graphic editors. Just I wanted to share the tip here.

When I feel the composition of any cartoon is going to be very complicated than I go for creating rough sketches of elements in the cartoon on separate sheet of papers.

First I created Santa cartoon character creating his own portrait on canvas. Later I thought of adding a dog, girl and boy. Drawing these characters directly in front of Santa Cartoon Character will mess new pencil lines with previously drawn lines and increase frequency of erasing process.

After inking. scanning and coloring , placed the graphics on differen layers. I tried three compositions by moving movable characters (Dog, Girl and Boy) to different locations. Those combinations are:

(1) Girl and Boy extreme right hand side both viewing at canvas board and dog in the middle.

(2) Girl and boy extreme left hand side watching canvas and dog extreme right hand side facing towards canvas.

(3) Dog extreme left hand side followed by girl (viewing canvas) and boy extreme right hand side (viewing canvas).

I also tried some other placements but I felt the third combination was the best composition. You can flip the characters and increase/decrease the character sizes to match (proportionate) with main (Santa) drawing. That is power of the graphics placed on layers.

Advantages of this process:

(1) Character modification is easy without disturbing background.
(2) Individual characters can be used in other composition.

Please click on image to view enlarged image.

Click Here to view final colored composition Here.

________________________________________________________

Comments by Eli:

I like your characters, especially Santa and snake! I'm thinking the final composition could be a little tighter though if you moved everything to the left and then put the dog in front instead of to the side, right now it seems all the action is heavy on the right side. Just me being a composition freak, the old art teacher coming out. Thanks for your comments on my blog, if you ever have any constructive crits I'd love to hear them!


Thanks Eli for your kind suggestion about composition. I made a new post at Santa Cartoons with your suggestions implemented. Please click here to view changes.

Feb 6, 2008

Blanket Illustrations/Cartoons

After a gap of one year, again here are my pencil sketches and colored illustrations created for Illustration Friday weekly topics . Illustration Friday inspired me a lot to drive away my laziness and made me to search for my art material.

The following first two cartoon/illustrations are rough sketches created on paper. Other two are after inking and coloring in photoshop.


The color images are output of my usual procedure. That is inking, scanning and coloring.


Creating children characters is great thrill. I know the body proportions are not perfect...but I could not restrict myself to post in my blog. There is lot of inspiration around. I need to practice a lot about drawing children faces.

Now there is something to blog every week. Thanks to Illustration Friday!.

May 28, 2006

Art Works

Please also View:
(1)Designing Avatar Tutorials
(2)Animating Body Parts


For me the difficult task in illustration is making rough sketches. My best time for Sketching is morning hours. Pencil and Eraser are my best friends. Scribbling...Scribbling...Scribbling...without much attention to details. Almost careless light and dark pencil lines till I get the correct anotomy of my sketches. When Iam happy with my drawings then I switch over to inking.
The following drawing tools I use for sketching and inking:

(1) HB pencil
(2) Non - dust eraser
(3) Crowquill nibs
(4) Camel Waterproof Drawing Ink 07 ( 07 is product code. Qty 20ml. Cost 13 INR).
(5) No.2 Brush for filling dark loops in drawing like hair and shades.
Qty-20 ml is sufficient for me to ink plenty of drawings. Fortunately this ink available in all stationary shops nearby me.

All imaginary light and dark lines of my sketches will have their perfect details during inking process. Till that time it is difficult to assume viewers what pose is it exactly. When I finished with inking I will let my sketch to dry say about 5 minutes. Then my daughter will assist me to erase all pencil lines.
The Final process is scaning. I normally scan all my black and white drawings at 300 dpi and save them in Tiff format in photoshop.
♥♥♥ Watch this page for more updates ♥♥♥

Rough Sketching, Scanning And Coloring Tutorials

Scribble and scribble till you get the required image in your mind. Do not Pay Much attention to details. Details like eyes, ears and other minute parts can be added at last once you are happy with posture of the required character.

For more information please visit pukkalla.com

Step - by - Step tutorial will guide you how to make a rough sketching, scanning and coloring in photoshop.

Bloggeries Blog Directory
Top Arts Blogs