
After a gap of one year, again here are my pencil sketches and colored illustrations created for Illustration Friday weekly topics . Illustration Friday inspired me a lot to drive away my laziness and made me to search for my art material.
The following first two cartoon/illustrations are rough sketches created on paper. Other two are after inking and coloring in photoshop.

The color images are output of my usual procedure. That is inking, scanning and coloring.

Creating children characters is great thrill. I know the body proportions are not perfect...but I could not restrict myself to post in my blog. There is lot of inspiration around. I need to practice a lot about drawing children faces.
Now there is something to blog every week. Thanks to Illustration Friday!.
Feb 6, 2008
Blanket Illustrations/Cartoons


May 28, 2006
Art Works
Scribble and scribble till you get the required image in your mind. Do not Pay Much attention to details. Details like eyes, ears and other minute parts can be added at last once you are happy with posture of the required character.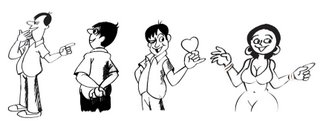 Please also View:
(1)Designing Avatar Tutorials
(2)Animating Body Parts
For me the difficult task in illustration is making rough sketches. My best time for Sketching is morning hours. Pencil and Eraser are my best friends. Scribbling...Scribbling...Scribbling...without much attention to details. Almost careless light and dark pencil lines till I get the correct anotomy of my sketches. When Iam happy with my drawings then I switch over to inking.
The following drawing tools I use for sketching and inking:
(1) HB pencil
(2) Non - dust eraser
(3) Crowquill nibs
(4) Camel Waterproof Drawing Ink 07 ( 07 is product code. Qty 20ml. Cost 13 INR).
(5) No.2 Brush for filling dark loops in drawing like hair and shades.
Qty-20 ml is sufficient for me to ink plenty of drawings. Fortunately this ink available in all stationary shops nearby me.
All imaginary light and dark lines of my sketches will have their perfect details during inking process. Till that time it is difficult to assume viewers what pose is it exactly. When I finished with inking I will let my sketch to dry say about 5 minutes. Then my daughter will assist me to erase all pencil lines.
The Final process is scaning. I normally scan all my black and white drawings at 300 dpi and save them in Tiff format in photoshop.
♥♥♥ Watch this page for more updates ♥♥♥
Rough Sketching, Scanning And Coloring Tutorials
For more information please visit pukkalla.com
Step - by - Step tutorial will guide you how to make a rough sketching, scanning and coloring in photoshop.


