
This is 8 frames loop.
Graphics were designed in Photoshop and imported in to Flash.
Apr 19, 2009
Flying Bird - Flash Loop Animation
Apr 5, 2009

Apr 4, 2009
Walk Cycle - Flash Animation Tutorial
The above animation has been done in Flash.
Initially we need to design the walk cycle in 8 frames for half walk cycle. Copy all the 8 frames and paste them after 8th frame to have total 16 frames for complete walk cycle. Flip horizontally Each frame from 9 to 16. The frame rate set to 36fps.
You can design skeleton Character either in Flash or Photoshop.
I designed them in photoshop with the help of vector masks.
Mar 19, 2009
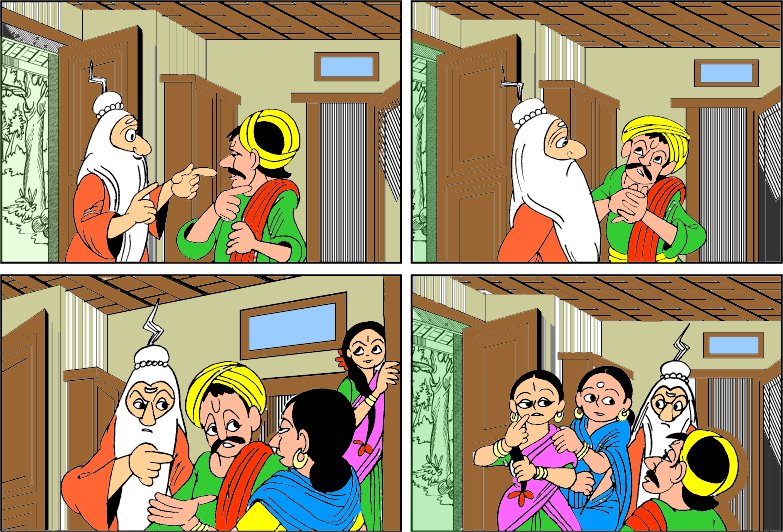
Signature Fun
Transformation of the signature in to Cartoon Face by Dr.Jayadev Babu, M.Sc.,Ph.D., Cartoonist and 2D Animator.
Dr. Sajja Jayadev Babu, M.Sc., Ph.D., is a Cartooonist and 2D Animator. He is my mentor. I got inspired from his simple lines of cartooning and learned how to draw cartoons. He was my faculty for 2D animation.
In the year 2008 I visited his home in Chennai along with my family. My daughter was very curious about to see how he is going to convert her simple signature in to a funky drawing. No one knows what would be the final out come. All were curiously watching the transformation of signature in to cartoon face.
I captured all the action with my Cam Recorder. With his permission I have uploaded the video to youtube on 19 Mar 2009.
Thanks to Dr. Sajja Jayedev Babu for his valuable time.
Mar 12, 2008
Kids in Garden

Kids Playing near pond in the Garden.
Cartoon/illustration for this week illustration friday topic "Garden".
Mar 6, 2008
Leap in Life

Leap in life of butterfly. Leaping through four distinctive stages called Metamorphosis. The great transformation in nature.
Cartoon for this week's Illustration Friday topic "Leap".
Feb 27, 2008
Multiple Role of an Iron Box.

This week Illustration Friday topic is "Multiple".
For creative minds, the sky is the limit.
Touch the sky with creativity.
Give them Topic, Tell your theme, explain the concept... creative minds are ever ready to keep their creative juices are flowing.
Every word is having a pictorial face.
Multiple means consisting of more than one part.
Taking birth again and again is Multiple Birth.
An employ play multiple roles in the office to keep his boss happy.
It is difficult to judge some people having Multiple personality.
There is a need to display multiple behavior to survive in the society.
The above cartoon created on Multiple purpose of an Iron Box..
Feb 21, 2008
Pencil Sketches and Final Color Composition

The above pencil sketches are created for my blog Santa Cartoons. I am not posting here the final composition of colored cartoon (for the shake of avoiding repetition.). After going through the following description you can View Here the completed colored Cartoon.
Every artist has his own way of creating colored/black and white graphics/cartoons in their favorite graphic editors. Just I wanted to share the tip here.
When I feel the composition of any cartoon is going to be very complicated than I go for creating rough sketches of elements in the cartoon on separate sheet of papers.
First I created Santa cartoon character creating his own portrait on canvas. Later I thought of adding a dog, girl and boy. Drawing these characters directly in front of Santa Cartoon Character will mess new pencil lines with previously drawn lines and increase frequency of erasing process.
After inking. scanning and coloring , placed the graphics on differen layers. I tried three compositions by moving movable characters (Dog, Girl and Boy) to different locations. Those combinations are:
(1) Girl and Boy extreme right hand side both viewing at canvas board and dog in the middle.
(2) Girl and boy extreme left hand side watching canvas and dog extreme right hand side facing towards canvas.
(3) Dog extreme left hand side followed by girl (viewing canvas) and boy extreme right hand side (viewing canvas).
I also tried some other placements but I felt the third combination was the best composition. You can flip the characters and increase/decrease the character sizes to match (proportionate) with main (Santa) drawing. That is power of the graphics placed on layers.
Advantages of this process:
(1) Character modification is easy without disturbing background.
(2) Individual characters can be used in other composition.
Please click on image to view enlarged image.
Click Here to view final colored composition Here.
________________________________________________________
Comments by Eli:
I like your characters, especially Santa and snake! I'm thinking the final composition could be a little tighter though if you moved everything to the left and then put the dog in front instead of to the side, right now it seems all the action is heavy on the right side. Just me being a composition freak, the old art teacher coming out. Thanks for your comments on my blog, if you ever have any constructive crits I'd love to hear them!
Thanks Eli for your kind suggestion about composition. I made a new post at Santa Cartoons with your suggestions implemented. Please click here to view changes.
Feb 19, 2008
The Universal Law of Gravitation
Illustration Friday : Weekly Topic "Theory".
Again there is a tree which is adding a lot of green to the cartoon.
Gravitation gives objects weight. Cartoon designed on this weight "Theory". Please click on cartoon for enlarged view.
Feb 12, 2008
Choose - Creep or Not Creep
There are plenty of concepts in mind for the topic "Choose" (Illustration Friday - Topic of the Week). First I thought of Lion or some other dangerous animal at the bottom of the tree. But finally decided to "Choose" heavy floods around. Natural Calamities are common phenomenon and are unexpected.
Finding humour from trouble situation is really great fun. Raising water levels on the ground and poisonous situation overhead which leading to "Choose" situation in the cartoon. The eagle eye view (perspectives) of drawing is not perfect. I put my best efforts to share the concept with my fellow designers/cartoonists.


Feb 7, 2008
Valentine's Day Greetings From India
From India..."Happy Valentine's Day" to all!
Showcasing "Valentine's Day Greeting Card" featuring "INDIAN" lovers at a Park.
Making of this Greeting Card:
Rough Sketches:
The final greeting made from different graphics drawn separately and combined them in photoshop.
Take the help of light box.
Draw the background first.
Next draw the required cartoon character on separate paper by keeping them over background layout. After inking scan all the graphics to photoshop and color them. Drag one by one on to single file. Resize and arrange them to add depths.
This is very easy way of composing scenes. Same background can be used for other drawings. Individual characters also can be utilised for some other purpose.
Feb 6, 2008
Blanket Illustrations/Cartoons
After a gap of one year, again here are my pencil sketches and colored illustrations created for Illustration Friday weekly topics . Illustration Friday inspired me a lot to drive away my laziness and made me to search for my art material.
The following first two cartoon/illustrations are rough sketches created on paper. Other two are after inking and coloring in photoshop.

The color images are output of my usual procedure. That is inking, scanning and coloring.![]()
![]()
Creating children characters is great thrill. I know the body proportions are not perfect...but I could not restrict myself to post in my blog. There is lot of inspiration around. I need to practice a lot about drawing children faces.
Now there is something to blog every week. Thanks to Illustration Friday!.
Jan 27, 2008
Rotating Objects with Motion Guides in Flash.
Before proceeding to Motion Guide animation please also check for animating body parts of character. I do not want to repeat same tutorial here again and again which has already been explained in my new site TutorialBalcony. I want to share this with visitor of my blog here. This post is about brief discussion on animating Parts of an Object or Character.
I always go for three types of animations in simple flash projects with no action script involvement.
(1) Motion Tween.
(2) Frame-by-Frame Animation and
(3) Guide Motion.
This post is about Motion Guide.
We can create some eye catching animations with Motion tween and Motion Guides. Motion Tween can only be applied to Graphic symbols. We need to first convert all the graphics to be animated in to Graphic Symbols. At the same time we can't apply Shape Tween to Graphic Symbols. Briefly...apply Motion Tween for Graphic Symbols and Shape Tween for Non-Graphics Symbols. It means there is no need to convert a Graphic in to symbol to apply shape tween to it.
Motion Guide Animation is very useful when it comes to animate an object in certain curve or zig zag direction. It needs a path to be drawn on separate layer and Graphic Symbols/Movie Clips to be animated in particular path to be placed on another layer.
If a propeller is rotating its blades and we need to rotate the propeller in circular motion along with its blades rotation than we need to put the the propeller blades rotation in Movie Clip and again this Movie Clip to be attached to a circular Motion Guide.
Confusing?...
I explained below with rough examples:
I am not able to upload .swf files.
You can view the above propeller animation
Here.
It is a movie clip of a propeller and Attached to a circular Guide path (see below image). Propeller not only rotates on its own axis but also it follows circular guide path while rotating. Guide path can't be seen while playing movie. I added an extra layer at bottom to show the circle.
The full animation you can view
here.
View
1. Propeller Rotation.
2. Propeller Rotating along with Circular path.
The Propeller is a Graphic symbol. Rotated 180 degree at frame 10, applied Motion Tween and converted to movie clip. Propeller movie clip attached to a circular guide path which is consisting of total 100 frames at the rate of 36 frames per second.
I very rarely go for Shape Tweens. It does not mean that I hate Shape Tweens. I use as and when I feel it is very necessary to insert. To make shape tweens perfect we need to insert "Shape Hints" which is almost time taking. Shape Hints are very useful to animate shapes in particular directions. Complex Shape Tween is possible only with shape hints.
Implementation of action script in animations will bring file size considerably down. But we need to plan logically every bit of animation. But it is important to know basics of actionscript. If we do not know how to stop an animation at the end of the frame than the animation will loop again and again.
In my next post I will write about Shape Hints and its awesome animation effects.
Jan 7, 2007
Butterfly Life Cycle
Recently I animated a part of Butterfly life Cycle for Cocoon.Org.
Screenshot of End of the Part
There are total 4 parts in this animation. I added a Replay button at the end of the Part-I animation to avoid refreshing of the page to watch the animation once again. I will be adding other parts soon.The First Part is about birth of Caterpillar (Larva)from Egg. The other parts will include singing "Happy Birthday to you" by a bird, Caterpillar's walk cycle, eating and conversion to Pupa (Chrysalis) and finaly taking shape of Butterfly (Adult).
The Life Cycle of Butterfly allways a wonder to me. As a adult Butterfly can't eat. All its eating days ends with Pupa stage. During Caterpillar (Larva) stage it its lot of leafs to grow and remain alive during Pupa stage. As a Adult Butterfly only drinks nectar through its straw like spiril proboscis and live for only short time.
Iam very lazy at doing animations. Lazy because... for any 2D animation, little bit of creativity and preparation prior to animation are essential requirements. Without making few drawings, without use of pencil, rubber and paper it is almost impossible for me to do any animation works on computer. I won't use any Wacom Tablet for artworks that are required for animation.
May 28, 2006
Art Works
Scribble and scribble till you get the required image in your mind. Do not Pay Much attention to details. Details like eyes, ears and other minute parts can be added at last once you are happy with posture of the required character.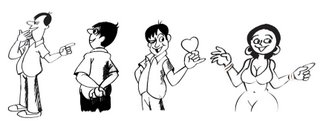 Please also View:
(1)Designing Avatar Tutorials
(2)Animating Body Parts
For me the difficult task in illustration is making rough sketches. My best time for Sketching is morning hours. Pencil and Eraser are my best friends. Scribbling...Scribbling...Scribbling...without much attention to details. Almost careless light and dark pencil lines till I get the correct anotomy of my sketches. When Iam happy with my drawings then I switch over to inking.
The following drawing tools I use for sketching and inking:
(1) HB pencil
(2) Non - dust eraser
(3) Crowquill nibs
(4) Camel Waterproof Drawing Ink 07 ( 07 is product code. Qty 20ml. Cost 13 INR).
(5) No.2 Brush for filling dark loops in drawing like hair and shades.
Qty-20 ml is sufficient for me to ink plenty of drawings. Fortunately this ink available in all stationary shops nearby me.
All imaginary light and dark lines of my sketches will have their perfect details during inking process. Till that time it is difficult to assume viewers what pose is it exactly. When I finished with inking I will let my sketch to dry say about 5 minutes. Then my daughter will assist me to erase all pencil lines.
The Final process is scaning. I normally scan all my black and white drawings at 300 dpi and save them in Tiff format in photoshop.
♥♥♥ Watch this page for more updates ♥♥♥
Rough Sketching, Scanning And Coloring Tutorials
For more information please visit pukkalla.com
Step - by - Step tutorial will guide you how to make a rough sketching, scanning and coloring in photoshop.
May 27, 2006
Cartoons,Illustration and Storyboard

The above illustration drawn to convey Greetings to Digitalpoint
=================================================
Photoshop Tips
Following are some photoshop key board short cuts:
1. To go back and forth in the history - Ctrl+Alt+Z and Ctrl+Shift+Z.
2. Press Ctrl key and hold to change selected tool to move tool.
3. To Zoom in and zoom out open window hold Ctrl key and press
"+" Or "-"
4. To hide tools and palette press Tab and to hide only palette
press Shift+Tab
5. To determine center point of the tool press Caps Lock.
____________________________________________
Simultaneously you can see changes on separate image set to it's
original size by making changes to a zoomed in copy of same image.
To make this happen,
(1) Open a image for editing.
(2) Go to Window >> Arrange >> New window xxxx
(3) Now you will have two document for same image.
(4) Keep first image at its original size and Zoomin second image to required size.
(5) Start modifiying enlarged (zoomed in) image.
Simultaneously you can see the same changes on the image
that set to its original position.
___________________________________________
Scanning and Coloring of Black & White Art Works
I swithced over to Web Designing in the year 2004. Before that I was doing illustrations, Comic strips and Cartoons as a full time employee in one of the 2D Animation Studios in the Hyderabad, India. There I learnt many tips and tricks in making meaningful art works and illustrations under able guidence of two of my childhood favorite cartoonists. It was almost my dream come true by working and sharing my childhood affection with them. My stay at Studio as an artist was a wonderful experience. The 2D animation activities in the Studio was an intresting watch for me. The Studio was a heaven for me watching the non stop activities of of Animators, Key animators, Cleanup and Background artists.
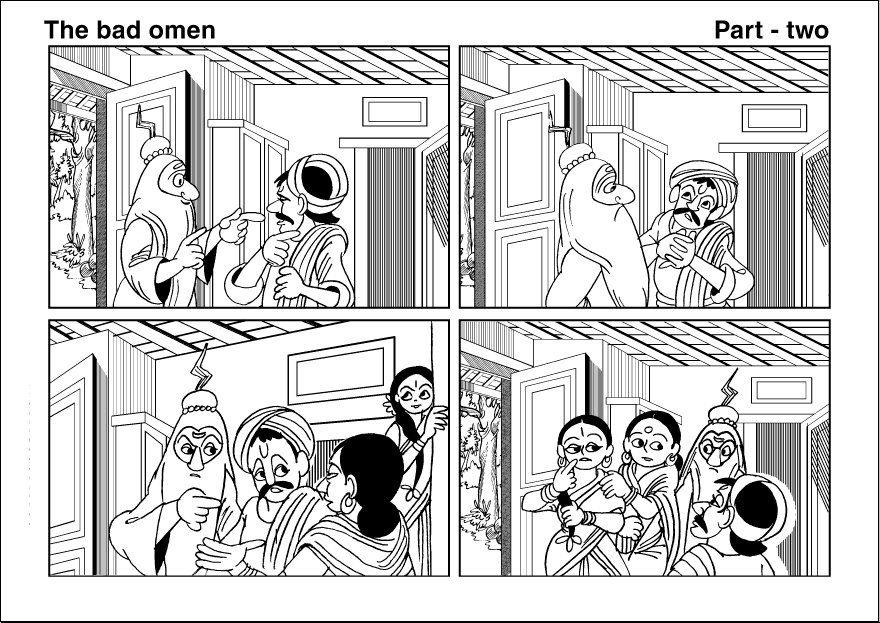
The following storyboard illustrations I made for some news paper. I do not remember the story. The narration for this story was on seperate files. The dialogue baloons are inserted separately in Pagemaker software after illustrations were made, scanned and colored in Photoshop. If anyone can guess what could be the story of these illustrations please email me.
Please click on image for Enlarged View


How black and white Artworks are colored in Photoshop:
Scanning
(1) Scan art works at 300 dpi with Black and white option selected in scanning option.
(2) Save scanned images in Tiff format.
(3) Open Scanned images in photoshop.
(4) Select pencil tool (Key board short cut : B) and join all the open lines with black color this avoids spilling of colors to unwanted areas.
(5) Select erase tool and erase dust and scratches in and around the scanned images
(6) Go to >> Image >> Mode and change the option from Bitmap to Grayscale. Grayscale dialogue box appears. Let be the default size ration = 1 and click OK to close the grayscale dialogue box.
(7) Again Go to >> Image >> Mode and change the option from Grayscale to RGB or CMYK .
(CMYK Mode used for Print Media)
(8) Finally select Bucket Tool, choose required colors from tool box color options and fill the colors.
Sample Color Image >>
Avatars
__________________
Avatars Created in photoshop for idolme.com forums.
Click on image to Enlarge
![]()
Caricatures
 Also Please visit my other tutorial:
(1) Designing Avatar Tutorials
(2) Animating Body Parts
Subscribe to:
Posts (Atom)


